As promised, here's a tutorial for a knight's tunic. The tutorial is based on this
Dutch tutorial from Eloleo. This tunic was made from an old pair of men's jeans. Of course, you can use any fabric you like, but if you're upcycling pants, you'll need a pair with wide legs, in order to have enough fabric.
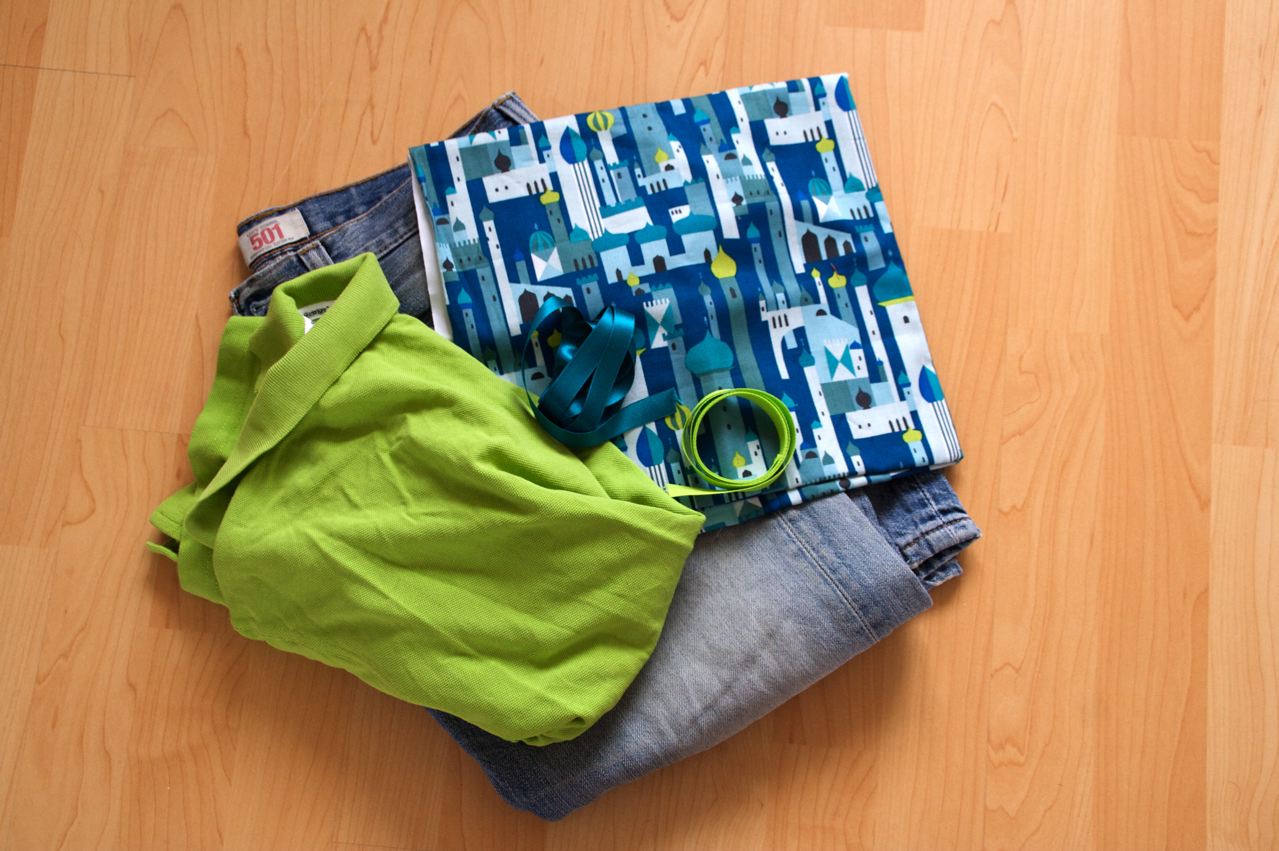
Your supplies
Needed for a tunic fitting a 5 to 6 year old:
-Tunic: a pair of adult size pants or jeans, or two pieces of sturdy fabric of 36 x 60 cm (14 x 24 inch)
-Piece of velcro of 5 cm
-Waistband: a strip of cotton of 72 x 9 cm (28 x 3.5 inch)
-150 cm (60 inch) gold, silver or satin ribbon
-Belt: a strip of colored cotton and a strip of the same fabric as used for the tunic, measuring 8 x 130 cm.
-Belt straps: 8 pieces of ribbon of 9 cm long
-Applique: small piece of cotton, fabric paint in various colors, freezer paper
-approx. 100 cm of bias band
 |
| Your supplies |
Tunic
Open the side seams of the pants with your seam ripper. Keep the double seam intact.
From each leg, cut a rectangle of 60 x 36 cm (24 x 14 inch), with the double seam as midpoint. Try to leave an 8 cm wide strip intact, which you can use for the belt.
Use your seam ripper to open up the seam of the front panel to create a 12 cm long placket. Reinforce the bottom of the placket with a narrow zig zag stitch. Finish the two sides of the placket with bias band.
Sew the tops of the front and back panel together, right sides facing. Finish the raw ends with a serger or zigzag stitch and topstitch the seam.
Now, cut the neck opening. Make sure that it is wide enough to fit over your kid's head. My opening was 18 cm wide (total circumference 45 cm). Finish the neck opening with bias band.
 |
| Neck opening |
Finish one of the sides of the front an back panel with the serger. If you don't have a serger, you can use a zigzag stitch or use bias band to finish the side.
Next, with the front and back panel facing each other, sew the finished sides together from 30 cm from the top to 40 cm from the top of the tunic. Then, sew the strip of cotton to the front and back panels. The top of the strip should be 30 cm from the top of the tunic.
 |
| Sew the waistband |
Sew a belt strap to both sides of the tunic, and three belt straps to the front and back, spacing them evenly.
 |
| Add the belt straps |
Finish the waisband by covering the top and bottom seams with the fancy ribbon.
 |
| Finish the waistband with some shiny ribbon |
Next, finish the other side of the tunic with the serger (or zigzag or bias). Sew one piece of velcro on the outside back piece, and the other on the backside of the front piece of the tunic.
 |
| Sew the velcro to the front and back pieces |
Now finish the bottom of the tunic. I kept it raw, because I liked the look of unraveled jeans, but you can also finish it with the serger, zigzag or bias.
 |
| The bottom edge |
Belt
Sew long ends of the strip of cotton and the strip of jeans fabric together, right sides facing. Turn, sew the short ends together and topstitch the belt. Use contrasting thread to create an extra effect (as shown in the belt of the grey tunic).
 |
| Topstitch the belt in contrasting color for a nice effect |
Shield
Last but not least, create a fancy shield for your little knight. This may be the best part of the whole endeavor, because you can really get creative here.
I happened to have an old table cloth with gold thread woven in it, which lended itself perfectly for the job, but any fabric could work. You could also use one of the back pockets of the jeans, since they already have the right shape.
Use your kid's initials, his/her favorite animal, or find a design online (I googled 'castle shield' and 'dragon shield' to find my templates). I then painted the shield, using a freezer paper stencil and fabric paint.
Next, I ironed fusible interfacing to the bottom of the shield, cut it out and appliqued the shield to the tunic, using a narrow zigzag stitch along the edges.
 |
| The finished shield |
Done. Your knight is ready to fight a dragon, or save a damsel in distress...