Wednesday, December 23, 2015

critter sweater

Hi guys, here's a quick post about the new favorite sweater I made for my critter-loving girl.

This sweater has everything she loves:
A comfortable hood,
drawstrings,
soft furry sleeves
and cute animal faces...
The pattern is the Otium sweater from the Dutch pattern designer Sofilantjes. It's a great pattern with a fun overlapping hood.
The furry sleeves were copied from a fun squirrel sweater by Emma en Mona.
The critter fabric is Menagerie Onyx by Sarah Watson (Art Gallery), bought at Petite Couture.

Merry Christmas to you all!

Wednesday, December 2, 2015

ADVTee blog tour

Hi all, here I am again, after a long, unintended blog break. 
As a matter of fact, I didn't touch my sewing maching for a few months, feeling that my latest creation -the upcycled denim vest-  had taken so much creative energy that I needed some time to recover.
But then Anne from Sofilantjes invited me to participate in the ADVTee blog tour, hosted by Sprouting Jube Jube. That was a good trigger to start thinking about sewing again. An easy, nice sweatshirt, the perfect project to get my sewing mojo back. 
The ADVtee pattern has two neckline options; a simple V-neck and an asymmetric button closure. I chose the V-neck. Simple, but I love how it turned out with the striped ribbing.
For the pocket I used a bit of the Menagerie Onyx fabric from Art Gallery. This fabric has been on my wish list for a long time, so when I found out that Petite Couture had it in stock, I immediately bought a yard. It's such a great print, with all these cute animal faces; perfect for fun details such as this pocket.
I sewed a size 3 for my 2,5 year old, and it fits perfectly. As you can see, I didn't hem the sleeves and bottom before taking these pictures. Daylight is scarce these days, so I had to take the photos before finishing the sweater. 
I'm really happy that I could join this tour, because I love this sweater. I've already printed out the size 9, to make a version for my daughter. Can't wait to get started...so I think I've got my sewing mojo back. Thanks Anne and Deb!
Curious what other participants in the blog tour made? Check out the tour schedule here:

Nov 30: From-a-Box - The Wholesome Mama - Sprouting JubeJube
Dec 1: Lulu & Celeste - Handmade Boy - Boevenbende
Dec 2: Rebel & Malice - Vera Luna - Liesel Love
Dec 3: Vaahtokarkkimonsteri - Huisje Boompje Boefjes - Khadetjes
Dec 4: Call Ajaire - Straight Grain - Nononsonsmoms

And to celebrate this blog tour, Sofilantjes is giving a 20% discount on their patterns. You can use the code "CELEBRATE" at checkout  from November 30th to December 6th.

Saturday, September 26, 2015

An experiment

"Scientist by day, seamstress by night." That's how I describe myself in my profile. Of course, these are not completely separate identities, and sometimes my sewing activities are strongly influenced by my academic nature. Those of you who have followed my blog for a while know that I like to experiment. Sometimes the result is great, sometimes it's rather, well, explosive.... (read the story about exploding wool here).
Anyway, I came up with a new idea and thought it would be a nice experiment to see if I could turn it into reality. And since I was on a roll, I decided to write this post in a scientific way too. At least some of you - fellow researchers- might appreciate that.

So here we go...

RESEARCH QUESTION
Is it possible to turn discarded jeans into a wearable and cool quilted vest?

DESIGN
The envisioned design is sketched in the Figure below.
The aim was to design the vest with a continuous pattern. Thus, there would be no side seams or shoulder seams. The hood would be created by attaching the two back middle strips to the front middle strips. The pockets would be hidden in the pattern.

METHOD
Materials Several pairs of discarded jeans, in various shades of blue, thread, a 50 cm zipper, half a yard of lightweight knit, half a yard of batting


Procedure. The flowchart of the procedure is displayed in Figure 1.
  1. As a first step, the jeans were cut into parallelograms (width: 13 cm, height: xx cm, angle: 36*). Next, several lay-outs were tried. The optimal lay-out was determined based on peer feedback gathered through a small survey on Instagram.
  2. Then, the parallelograms were attached in long strips, and next the strips were sewed together.
  3. The fit of the garment was tested on the end-user. Several seams were opened using a seam ripper, and the fit was adapted.
  4. Step 3 was repeated multiple times
  5. The zipper, lining and waistband were added
  6. The armholes were finished
  7. Step 3 was repeated (grumble...) 
After completion of the process, end-user feedback was gathered. In return for payment (2 marshmallows per end-user), photos were taken (weather conditions: slightly overcast, 18 degrees Celcius)
RESULTS
The end result of the experiment is shown in the remaining Figures.
The envisioned design was realized completely. With respect the wearability, the experiment was quite successful. 
The vest turned out slightly too big for end user 1, and way too big for end user 2, but considering the growing rate of both users, this is not too problematic. 
With respect to the coolness, the first end user gave a score of 6 out of 10, whereas the second end user gave a score of 10 out of 10.  
CONCLUSION
The experiment shows that it is possible to turn discarded jeans into a wearable and cool vest (according to two end users). The process took a fair amount of time, and the seam ripper was used frequently. Nevertheless, I'd like to conclude that this experiment was successful.

Wednesday, September 16, 2015

The versatile vest

Yesterday, I showed you the outfit I made for the Sewing for Kindergarten series. The photoshoot for that post was one of the best we've ever had, with beautiful soft September light, a field full of wildflowers and a cooperative kid who was willing to model not one, not two, but three different outfits.

As I mentioned in my last post, I tried to make some items that would coordinate well with other clothes in B's wardrobe. Especially the vest, with it's neutral base colours and three different hoods, should be quite versatile. To try it out, we pulled some clothes from his wardrobe and started mixing and matching.

Without much further ado, here are two combinations featuring the versatile vest....

The sweet look
My son loves pink, and I've grown to love it too, especially this kind of salmon pink. It's a soft and friendly colour that goes really well with the neutral tones in his outfit.
The polo is a pattern from Ottobre magazine, but I won't spend too much time on it since I wasn't too happy with this pattern. The instructions were rather unclear and the fit isn't great either. If you know of a good polo pattern, please let me know.
The sweatpants are the Moto Maxx pants from Love Notions. The slim fit of these pants is great for my tall, slender kids. They are made in the softest sweat fabric I've ever touched. My kids (I also made a pair for my daughter) love them, and wouldn't wear anything else if they were allowed.


The cool look
Here he's wearing the same Moto Maxx pants, but now topped with a DIY-printed shirt (blogged here). And this hood has a fun geometric print too.
Which look do you prefer? 

Tuesday, September 15, 2015

Sewing for Kindergarten

Hi all! After a looong summer break, I'm finally back! 
Today I'm participating in the Sewing for Kindergarten series hosted by Mie from Sewing Like Mad. Let's start with Mie's questions, before telling you a bit more about the outfit I sewed for my Kindergartner.

Is this your first time sending a child to Kindergarten? If not, what number child is this?
B is my second child to enter Kindergarten. His older sister is in second grade, and his younger brother will enter school in two years.

Do you feel like crying or celebrating?
Celebrating, definitely. I love to hear the stories and songs that he brings home from school, and to see the daily pile of drawings he created.
And what about your child?
B loves going to school. This is his second year in Kindergarten (in the Netherlands, children start ‘kleuterschool’ at age 4), and this year he is one of the ‘oudste kleuters’ (second-year Kindergartners), which comes with a lot of responsibilities… helping the teacher, being a role model for the youngsters, and supporting them (for example when getting dressed for outdoor play). He is taking this new role very seriously, and enjoys it too.
What kind of school does your child attend?
My kids attend a ‘Vrije School’ (Free School), the Dutch term for Waldorf school. The school’s motto is ‘To learn with your heart, head and hands’ and it aims to teach not only cognitive skills, but also focuses strongly on the development of social and creative skills. According to the Waldorf pedagogy, Kindergartners learn most through play and experience, so a lot of time is spent playing (indoors and outdoors). In addition, the school has a strong focus on creative expression, which already starts in Kindergarten. The children learn to use different materials (water color, crayons, bees wax, wool, wood, etc.) and various techniques. It's a great school, and both my kids love going there.

Question to your kindergartner: What has been the best and worst part so far?
Best: drawing
Worst: going to after-school-care

So now, let's tell you more about his outfit.
I usually sew without giving much consideration to whether my new creation will match with the other clothes in my kids' wardrobes, resulting in a rather... well... 'eclectic' mix... My son dresses himself, and more often than not his combinations are worthy of the #realkidsrealclothes Instagram tag. I don't really mind, but this time I wanted to create some items that could be easily mixed and matched with the other items in his wardrobe.
Let's start with the vest. The sleeveless vest from his Stylo outfit has been his favorite item this summer.With the cooler weather ahead, I reckoned a padded version would be great for layering. Like it's predecessor, this vest is based on the Aztec Hooded Vest by See Kate Sew, but with a few twists. Instead of welt pockets, I added two diagonal panels and stitched only the top half of these panels to the front pieces, creating a fun detail and two huge pockets.
The other twist concerns the hood. I really couldn't decide which fabric to use to line the hood, so I came up with a solution that didn't require any choosing: a detachable hood. I added a collar with a flap at the back, which (more or less) hides the zipper that attaches the hood. I should have interfaced the collar pieces, because it's not really stiff enough to stay upright, but other than that I'm pretty pleased with this construction. An added benefit is that the hood lies nice and flat, exposing the lining nicely.
All fabrics came from my stash.The main fabric is an upcycled cotton sheet in my favorite colour, and for the lining of the body I used the last bits of some flannel plaid.
For the first hood, I used a vintage floral pillow cover.
For the second, red and pink stripes.
The vest has already become a new favorite. My boy has worn it more or less non-stop since the photoshoot, changing hoods every day. I've created three hoods in total, and will show you some more combinations later this week.
Next, the pants. These of course are the Twisted Trousers from Thitchy Threads
I originally started these trousers as part of my Stylo contribution, but then realized that the olive green fabric and orange details made them too 'autumny', and put them aside.
The trousers lay unfinished for a couple of months, and I just had to add the waistband and hems to finish them. Just in time, since B has made a major growth spurt over the summer. I remember them being a bit too wide and way too long when he tried them on the first time, but now the fit is just perfect!
And autumny they are indeed! Look how perfectly they match with the rosebuds....
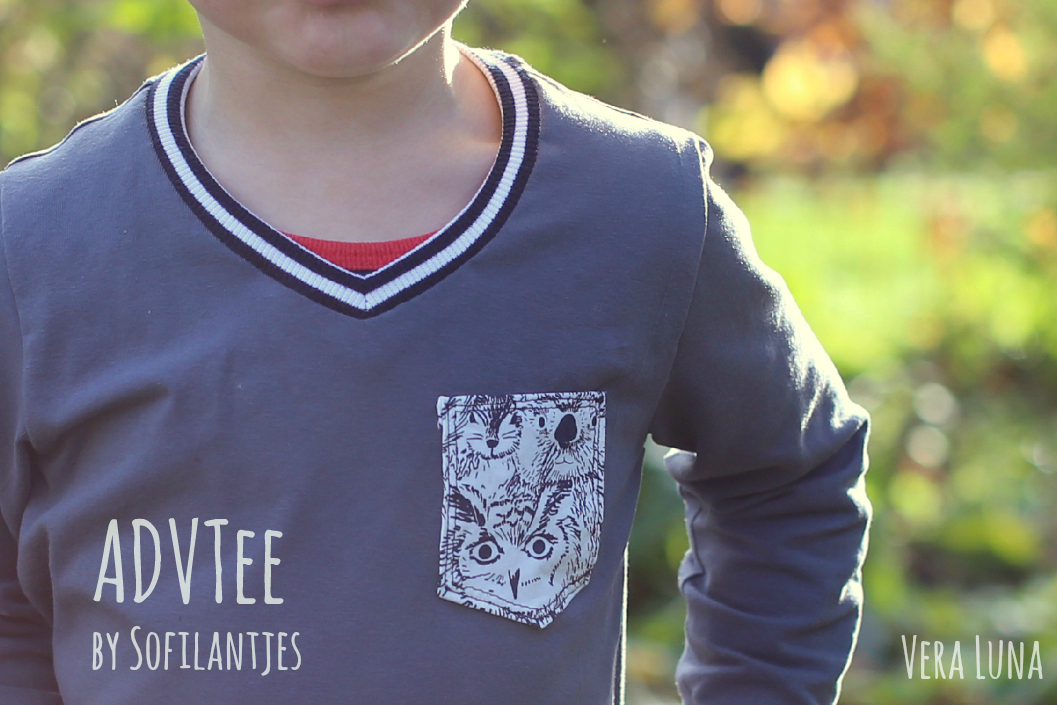
Last but not least, the tee. 
The quote is his own, and says: "STOP, can I finally say something too?" 
You know, this guy LOVES to talk. His head is full of thoughts that he wants to share. Continuously...! 
He talkative nature makes him a very open and social kid, but sometimes his incessant talking does drive people crazy. On his very first day of school, he was excitedly chatting away, until after 10 minutes one of his classmates complained: "Can you please stop chattering in my ears!" Ha! B had made his entrance!
Whenever he is interrupted for more than two minutes, he will burst out: "Can I FINALLY say something too?" so I thought it would be fun to put these words on a t-shirt. I used a store bought t-shirt and had the quote printed at a local print shop, because I wanted the letters to be perfectly crisp and clear. 
When I showed B his new tee, he was really excited: "That's great mom, now I can simply point at my tee whenever I want to say something!"
So there you have it; a new back to school outfit for my boy. I tried to make an outfit that matches his character; a mix of relaxed, easygoing, expressive, and sweet. What do you think? Did I succeed?
 I'm really looking forward to seeing everyone else's contributions. If you are too, here's the tour schedule for the series.

Mie, thanks for inviting me! I hope to be back in two years, when my youngest is entering Kindergarten.